úterý 10. července 2012

Ork Bonebreaka Gunwagon finished!

Nearly a year ago I started working on a Bonebreaka gunwagon - second edition Epic ork tank armed with a Battlecannon and a Deffrolla. I made two posts with the vehicle, and now it is finally finished and painted. So, let's see the beast!

Luckily enough, I took the vehicle to a 6th edition test game on a gaming con, and a friend took some very nice pictures of the vehicle - this reminds me how important it is to have a good camera and know how to use it! I'll post about the game soon.

Battlewagon, Bonebreaka, Chimera, Gunwagon, Kitbash

Since my last update, I have added a conical (or should I say "comical") turret and some more details - for example the mushroom-like exhaust pipe on top or the teeth-like plates on the deffrolla holding arms. I've decided to "barricade" any leftover holes with small pieces of plastic, so it looks like the Orks looted the original weaponry and did not care much about replacing it or fixing the damage.

Let's look at some more regular pictures of the vehicle:

Battlewagon, Bonebreaka, Chimera, Gunwagon, Kitbash

I'm very proud of the paintjob, this must be the best looking vehicle I have so far (not that there are many). I actually mobilized my girlfriend for this one, and she has painted most of the vehicle! My job was mostly washing and highlighting the wagon, and adding transfers and dirt. And I think we both succeeded, the vehicle looked very good on the tabletop - pity it didn't kill anything!

Battlewagon, Bonebreaka, Chimera, Gunwagon, Kitbash

I hope you like the wagon and find it interesting or even inspiring. I really think second edition ork vehicles such as Bonebreakas, Gutrippas or Pulsa Rokkits deserve a second chance - in fact, now I think I'll start a Bonecruncha project one day!

One last thing - this vehicle has been actually made with the Dakka Dakka Ork Vehicle Competition 2011 in mind. So if you like it, you can give it a vote here! It's also worth checking the poll for other vehicles, you can find some truly incredible orky contraptions there.

Thanks for reading and see you soon!

středa 16. května 2012

Bad Moons AOBR Boyz

I'm still alive! Not really active though, it's exams time after all. At least I have finally finished my Assault on Black Reach Slugga boyz... Most of them were painted over a year ago though, the squad was just waiting for last few boys, and basing.


The last boy painted is the one with yellow helmet, and he was really just speed-painted. I can't believe it took me two years to realize how good looking yellow helmets are for Bad Moons. Oh well, at least I know what I will do with my shoota boyz.


I'm not really satisfied with the squad, but it will do for tabletop. To be honest, I hate those models! Painting them was fun at first, but turned really frustrating later. Bad Moons color schemes are quite rich on colors, and these models are really repetetive; sure, they are full of details, but these details are all the same. There's little room for conversions, too. That just gets annoying after first ten models.

Anyways, back to focusing on those pesky RL issues. Hopefully I'll update soon with pictures of Deff Dread. So, see you!

středa 21. března 2012

Finished: Magnetized Predator

Edit: Be sure to check out the wallpaper-size picture of this tank here!

It took ages, but my Predator is finally finished! I decided to make its weapons magnetized - after all, you never know whether the Annihilator pattern won't be worth it when the next Codex gets released. Anyways, let's see the dakkapred first!


I tried to make the vehicle more detailed and more weathered than my Rhino. More bright colors are used (mainly for targeters), and I've done some weathering around the exhaust pipes - nothing more than a simple drybrush, but it feels good.


A side view on the Destructor pattern, showing the weathering and a heavy bolter. I use a 1:1 mix of Tin Bitz and Chaos Black for the black metal on weapons.


I've already tested the Destructor in a small battle and I have to admit it is a beast (at least when it comes to putting down Orks). Yet, somehow, I like the design of Annihilator more, and I guess it can be seen on the model. A sniper tank with four lascannons (ok, three and a half, technically) just deserves respect; I wish this setup would be more worth it in-game. As a side note, I'm glad I got all the insignia right this time (gotta love that Insignium Astartes).


Finally, the controversial Maverick (or "autolas") pattern. Somehow this pattern actually feels the most basic for me, since it was the only one featured in Final Liberation, the game that got me into this hobby.

Anyways, let's take a short look on the magnetizing!

Magnet, Predator, Magnetized Predator Turret

The turret wasn't really hard to magnetize. What you need are 3mm wide, 1mm high neodymium magnets; they fit the holes almost perfectly. I also advise glueing a small piece of plastic on the turrets lower side, so that the weapon holds firmly and doesn't fall down (which is always a risk with small magnets). If you look carefully, you can see on the picture that I used just a small piece of sprue there, and it works great.

Magnet, Predator, Magnetized Predator sponsons

The sponsons are harder to magnetize right. I decided to go the easy way and replace the whole weapon support with a line of magnets - it works pretty good and is not really noticable on the model. Just be *very* careful to glue everything right and even, so you don't end up with the weapons leaning in sloppy angles. Drilling a correct size hole into the weapons themselves is annoying as well; perhaps a bit of green stuff might help there (didn't try though).

Magnet, Predator, Magnetized Predator

So here's the model with all its parts separated. The army building possibilities are great with magnetized models, but to be honest, if you are a perfectionist, go with the normal, un-magnetized look. If you are more into gaming, though, magnetizing will allow you to try a lot of options without proxying or buying multiple models and the Predator is a good model to get a grip on it, since you need magnets of only one size. Be sure to get a good bunch of them, thought - the turret part requires at least 6, and the sponsons require anywhere from 4 to 12, depending on the way you deal with it.

Anyways, I hope you like the vehicle! See you soon.

neděle 19. února 2012

Simple Combi-Flamer Conversion

Hello! You might have noticed my love for combi-weapons before in my tutorial for combi-plasma conversions. I'm fond of flamethrowers too, so this post will be about converting a combi-flamer using as basic bits and techniques as possible.

1. Basic materials

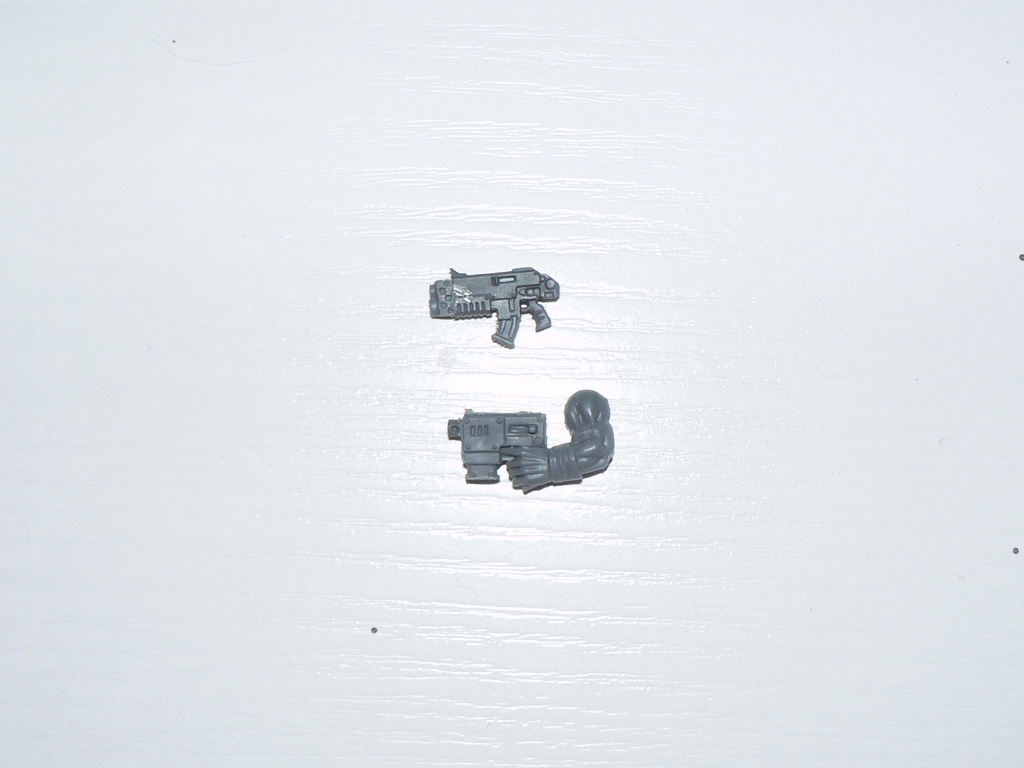
Yes, for this conversion you'll need not much more than a regular bolter and an orkish slugga pistol! You can find this particular slugga in Boy Mob kits, as well as in the Assault on Black Reach box.

2. Merging it together

I think the pictures are self-explanatory here. First, carefully cut off the boltgun's muzzle. Then, cut off the slugga's frontal part and glue it onto the boltgun. File the surfaces first so the new muzzle is exactly in line with the boltgun - you don't want to leave the gun with a bent barrel!

3. Adding a fuel tank

As an optional decoration, you can take krak grenades, split them up, file them and glue them onto the weapon. They'll make good fuel tanks for the flamer.

And that's all! The final product actually looks quite similar to the "Vulcan pattern" combi-flamer, which can be seen at Lexicanum. You can even try to put the krak grenade part under the barrel, to make it nearly identical.

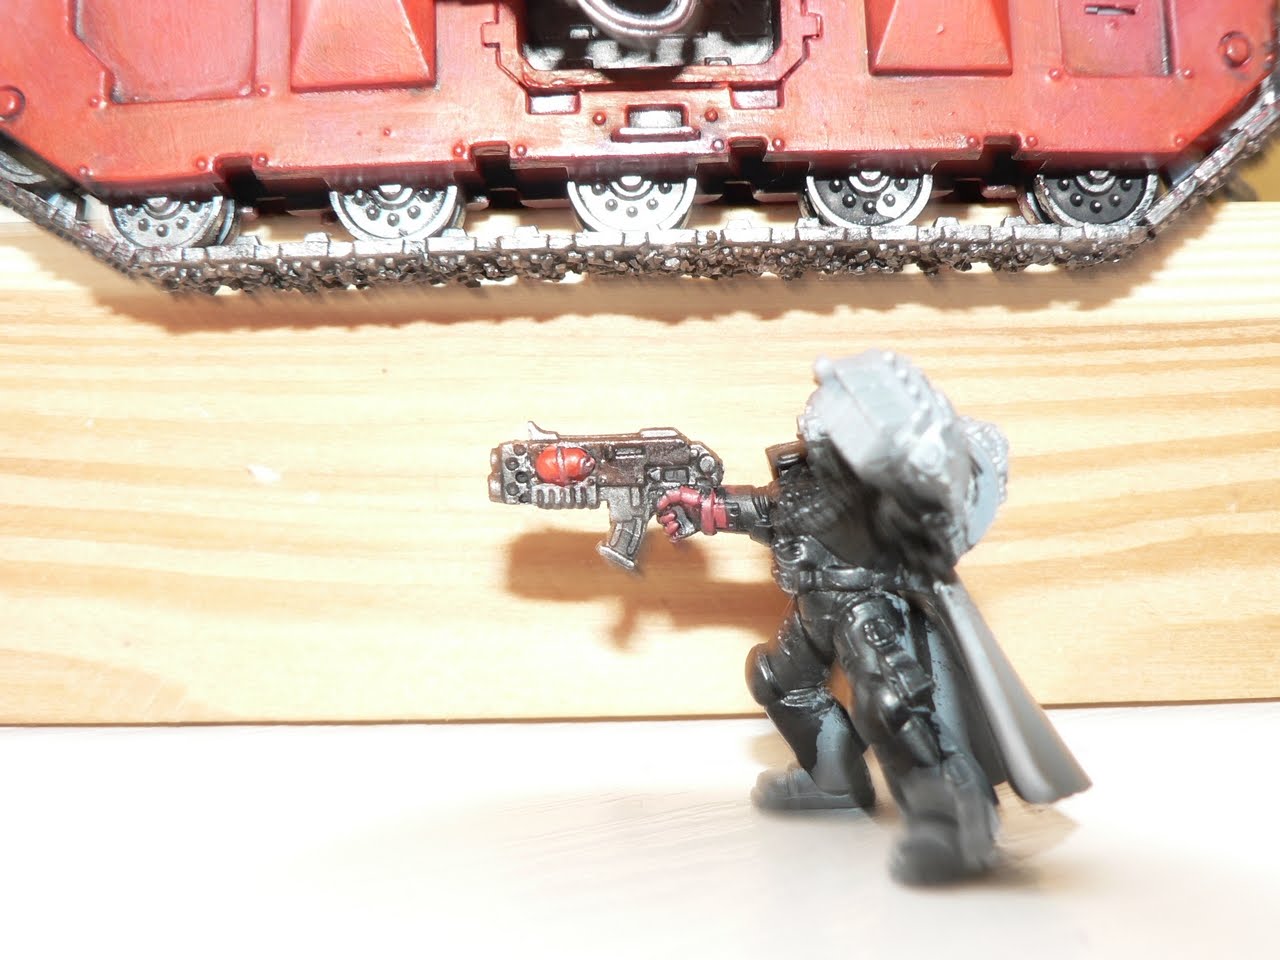
Here you can see the finished weapon on a commander:


And here you can see the weapon again, with some paint:


Anyways, I hope you found this tutorial helpful! As always, comments and criticism is most welcome.

sobota 21. ledna 2012

First Genesis Chapter Bike

I'm working on my new Ravenwing Battleforce and I have just finished the first Bike. Since I still have six more to do, I thought I'd share pictures, in case I'm doing something wrong.

So, here it is!

Bike, Genesis Chapter, Space Marines

As you can see, the marks show that the marine is an Assault marine of 2nd Company, 7th squad. I didn't put squad number on the bike, even thought it should be there according to Insignium Astartes. It seems illogical to me that the bike should show squad number, but not a company marking, so I didn't paint the squad number at all. After all, according to the fluff, bikes belong to the chapter Armoury, and not to Companies (as do Rhinos and some other vehicles); the Companies instead request them according to mission requirements.

Bike, Genesis Chapter, Space Marines

This picture shows a better detail of the base. I modelled the base according to a tutorial that was available on the Games Workshop site, but it looks like they took it down now! The base is covered by a thin layer of Green Stuff - and the bike track was made by pressing a spare Bike wheel into it. The effect is pretty cool, and complements my idea of a swamp planet pretty well, although most of the track is covered by the bike anyways. Here is a detail shot of the base, before I put the bike on it:


Regarding the bike model itself, it can be seen that it's mould dates back to the third edition. The detailing is simply not that good, but luckily a good paintjob can cover that well! I hope I have achieved that.

And that's about all for now, so - thanks for reading! As always, comments are most welcome. After all, I still have five more of these to do, and an assault bike as well!